The shift to cloud and serverless solutions has revolutionized modern infrastructure, empowering organizations with simplicity and efficiency. This article provides a comprehensive guide to deploying a static website on AWS using Terraform, covering essential services such as S3 for storage, CloudFront for content delivery, and Route 53 for domain management. Each step is explained in detail.
The article addresses common challenges and shares best practices, empowering readers to leverage AWS for their website deployment needs.
Your feedback and discussions are highly appreciated, as they enrich the experience for all readers.
Architecture Diagram :
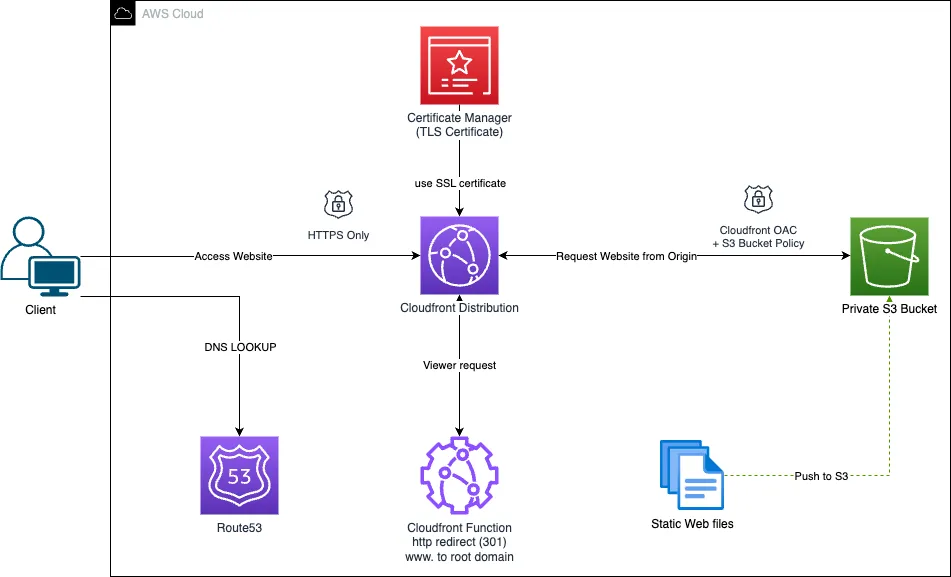
Hosting Static Website on AWS — Architecture
This architecture illustrates the flow of hosting a static website on AWS using Route 53, CloudFront, S3, Certificate Manager, and a CloudFront Function. Here’s how it works:
Client: Represents the end user who wishes to access the website.
When the client attempts to access the website, the first step is a DNS Lookup.
Route53: Amazon Route 53 is AWS’s Domain Name System (DNS) cloud service.
When the client requests the website, the first thing that happens is a DNS query. This query is resolved by Route 53 to point towards the appropriate CloudFront distribution.
Certificate Manager (TLS Certificate): AWS Certificate Manager is responsible for provisioning, managing, and deploying public and private SSL/TLS certificates for use with AWS services.
The certificate ensures that the website connection remains encrypted and is indicated by “HTTPS” in the URL.
The CloudFront Distribution fetches the SSL certificate from the Certificate Manager to ensure an HTTPS-only communication with the client.
CloudFront Distribution: Amazon CloudFront is a content delivery network (CDN) service.
Upon DNS resolution by Route 53, the client’s request hits CloudFront, which may either serve cached content (for speed) or request the original content from the S3 bucket if it’s not already cached.
Uses the SSL certificate to ensure HTTPS communication.
CloudFront OAC + S3 Bucket Policy: Origin Access Control (OAC) is a security feature that restricts access to an S3 bucket to only authorized CloudFront distributions. It is a more flexible and secure way to secure S3 buckets with CloudFront than the legacy OAI method.
When using OAC, you can ensure that your S3 buckets are only accessible to authorized CloudFront distributions, which helps to keep your data safe and secure.
CloudFront Function: This function is specifically designed for HTTP redirects. Let’s suppose someone types https://www.yourdoamin.com into their browser. Instead of staying on the ‘www’ version, this function quickly redirected them to the root domain https://yourdoamin.com (HTTP status 301). This provides a consistent domain experience and recommended for SEO and user experience.
Private S3 Bucket: Amazon S3 (Simple Storage Service) is where the website’s static assets (HTML, CSS, JS, images) are stored.
It’s designated as “private”, meaning direct public access is restricted. Only CloudFront, with its OAC, can fetch content from this bucket.
Static Web Files: Represents the static content of the website, such as HTML, CSS, and JavaScript files.
These files can be pushed or uploaded to the private S3 bucket, from where they are served to the end-users through the CloudFront distribution.
In summary, this architecture provides a highly available and scalable way to serve a static website with low latency. Using Route 53, CloudFront, Certificate Manager, and S3 in tandem, the setup ensures high availability, reduced latency, and HTTPS security for a seamless user experience.
Bringing the Architecture to Life !
Prerequisites
- AWS account with full administrative rights
- Terraform installed (Version 1.5 or higher recommended)
- A foundational understanding of AWS services and Terraform basics.
Overview of the Directory structure
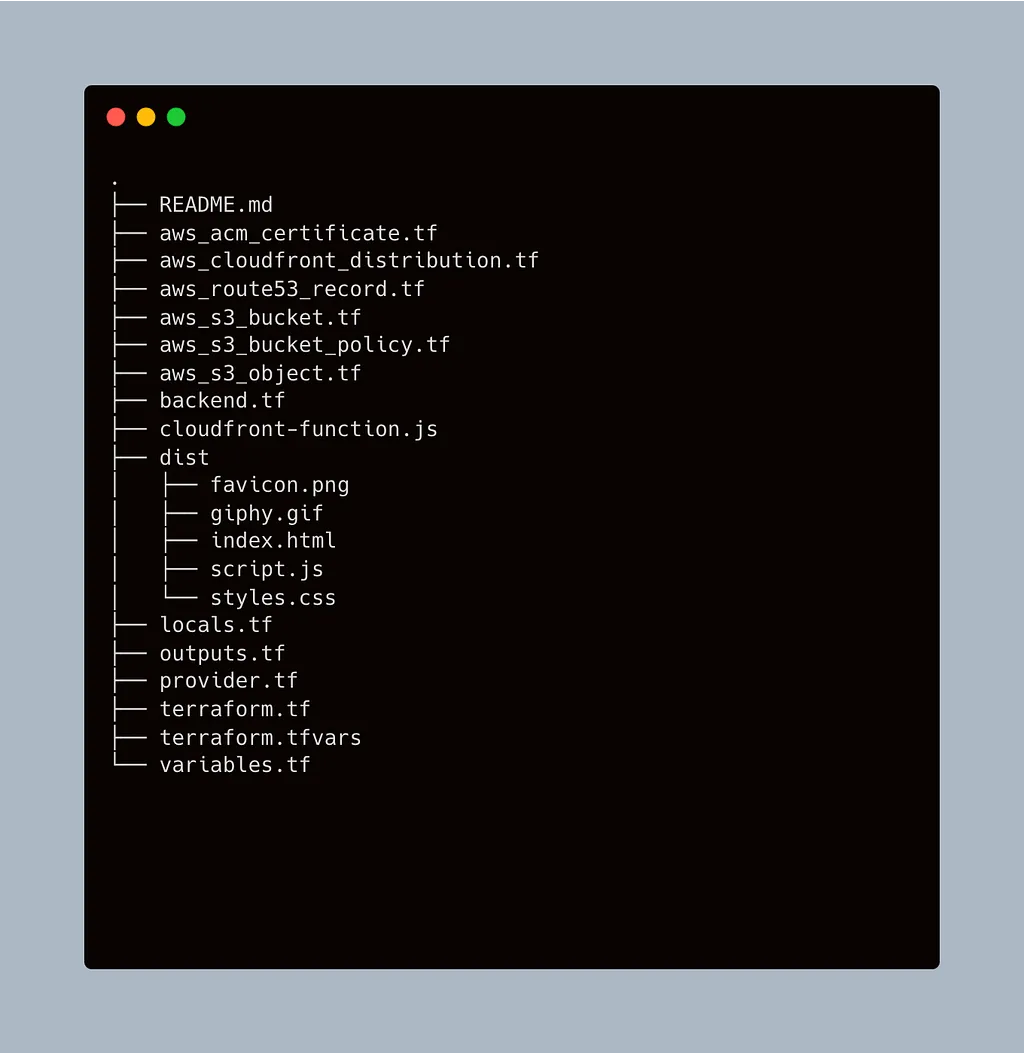
The project’s structure shown above, all Terraform files reside in the root level. The ./dist folder contains all static website assets, including HTML, CSS, JavaScript, and images, with ‘index.html’ serving as the main access point for users.
Declaring and Using Variables
Let’s start by declaring our required variables to keep our configurations dynamic. For clarity, each variable is paired with a comment outlining its use
variable "aws_region" {
  type        = string
  description = "AWS Region"
}

variable "prefix" {
  type        = string
  description = "The prefix to be added to resource names"
}
variable "domain_name" {
  type        = string
  description = "The domain name for the website."
}
variable "bucket_name" {
  type        = string
  description = "The name of the bucket without the www. prefix. Normally domain_name."
}
variable "common_tags" {
  type        = map(string)
  description = "Common tags you want applied to all components."
}
Defining Local Variables
Local variables in Terraform allow for intermediate computations and transformations within a module, ensuring cleaner code without modifying the primary input variables.
locals.tf:
locals {
  dist_dir    = "${path.module}/dist"
  module_name = basename(abspath(path.module))
  prefix      = var.prefix

  content_types = {
    ".html" : "text/html",
    ".css" : "text/css",
    ".js" : "application/javascript",
    ".json" : "application/json",
    ".xml" : "application/xml",
    ".jpg" : "image/jpeg",
    ".jpeg" : "image/jpeg",
    ".png" : "image/png",
    ".gif" : "image/gif",
    ".svg" : "image/svg+xml",
    ".webp" : "image/webp",
    ".ico" : "image/x-icon",
    ".woff" : "font/woff",
    ".woff2" : "font/woff2",
    ".ttf" : "font/ttf",
    ".eot" : "application/vnd.ms-fontobject",
    ".otf" : "font/otf"
  }
}
In the code block above, the dist_dir directs to the static website files’ location, while **module_name** and **prefix** assist in resource organization. Additionally, the **content_types** map aligns file extensions with their appropriate MIME types, guaranteeing accurate content delivery for various assets.
Setting up the AWS Provider
Terraform providers are initial configurations that specify the cloud platform we’re using (e.g., AWS, Azure, GCP …). They enable Terraform to communicate with the cloud’s API. For our setup, we use two providers: one for general AWS services and a secondary one for ACM, which is required for CloudFront.
provider.tf:
provider "aws" {
  region                   = var.aws_region
}

# CloudFront requires SSL certificates to be provisioned in the North Virginia (us-east-1) region.
provider "aws" {
  alias  = "acm_provider"
  region = "us-east-1"
}
Create an S3 Bucket for Your Website
We will use an Amazon S3 bucket to host the static assets of our website
aws_s3_bucket.tf:
# S3 src website bucket
resource "aws_s3_bucket" "static_website" {
  bucket = var.bucket_name

  tags = var.common_tags
}

resource "aws_s3_bucket_website_configuration" "website_bucket" {
  bucket = aws_s3_bucket.static_website.id

  index_document {
    suffix = "index.html"
  }

  error_document {
    key = "index.html"
  }

}

# S3 bucket ACL access

resource "aws_s3_bucket_ownership_controls" "website_bucket" {
  bucket = aws_s3_bucket.static_website.id
  rule {
    object_ownership = "BucketOwnerPreferred"
  }
}

resource "aws_s3_bucket_public_access_block" "website_bucket" {
  bucket = aws_s3_bucket.static_website.id

  block_public_acls       = true
  block_public_policy     = true
  ignore_public_acls      = true
  restrict_public_buckets = true

}

resource "aws_s3_bucket_acl" "website_bucket" {
  depends_on = [
    aws_s3_bucket_ownership_controls.website_bucket,
    aws_s3_bucket_public_access_block.website_bucket,
  ]

  bucket = aws_s3_bucket.static_website.id
  acl    = "private"
}
Let’s break down the role of each Terraform resource.
S3 Bucket Creation (aws_s3_bucket): This resource defines the primary storage location, named after var.bucket_name, for our website’s static content like HTML, CSS, and JavaScript files.
Website Configuration (aws_s3_bucket_website_configuration): This configuration sets up the S3 bucket to behave like a web server. When someone accesses the root of our domain, they’re served the index.html file. If there’s an error, we redirect them back to the main page.
Bucket Ownership Controls (aws_s3_bucket_ownership_controls): This establishes that the default owner of objects uploaded to our bucket, unless specified otherwise, will be the bucket owner.
Public Access Restrictions (aws_s3_bucket_public_access_block): For security, this configuration ensures that our bucket is not publicly accessible. It blocks public ACLs, policies, and restricts public access to ensure our content remains private.
Bucket Access Control List (ACL) (aws_s3_bucket_acl): This resource, which depends on the aforementioned ownership and public access controls, confirms that the overall access level for the bucket is set to “private”, reinforcing our data security.
Define SSL Certificate
For a secure website, we need an SSL certificate. Let’s set one up using AWS Certificate Manager.
aws_acm_certificate.tf:
# SSL Certificate
resource "aws_acm_certificate" "ssl_certificate" {
  provider                  = aws.acm_provider
  domain_name               = var.domain_name
  subject_alternative_names = ["*.${var.domain_name}"]
  #validation_method         = "EMAIL"
  validation_method = "DNS"

  tags = var.common_tags

  lifecycle {
    create_before_destroy = true
  }
}

# Uncomment the validation_record_fqdns line if you do DNS validation instead of Email.
resource "aws_acm_certificate_validation" "cert_validation" {
  provider                = aws.acm_provider
  certificate_arn         = aws_acm_certificate.ssl_certificate.arn
  validation_record_fqdns = [for record in aws_route53_record.cert_validation : record.fqdn]
}

resource "aws_route53_record" "cert_validation" {
  for_each = {
    for dvo in aws_acm_certificate.ssl_certificate.domain_validation_options : dvo.domain_name => {
      name   = dvo.resource_record_name
      record = dvo.resource_record_value
      type   = dvo.resource_record_type
    }
  }
  allow_overwrite = true
  name            = each.value.name
  records         = [each.value.record]
  ttl             = 60
  type            = each.value.type
  zone_id         = aws_route53_zone.main.zone_id
}
Here’s a breakdown of aws_acm_certificate.tf:
- aws_acm_certificate: This resource provisions an SSL certificate for our domain. It uses the DNS validation method, making the process seamless and not reliant on email confirmations.
- aws_acm_certificate_validation: Post the certificate creation, this resource ensures its validation. If you prefer DNS validation over email, ensure the validation_record_fqdns line is uncommented.
Note to Remember: DNS validation can take some time. It’s dependent on DNS propagation, so you might need to wait a while before the validation completes
- aws_route53_record: The SSL certificate necessitates specific DNS records for its validation. This resource creates those records in AWS Route 53. Later on, we will delve deeper into Route 53 configurations to integrate it thoroughly with our website setup.
Configure CloudFront Distribution
For any online business, delivering content swiftly and securely is key. AWS CloudFront addresses this by spreading content through a worldwide network of data centers, guaranteeing quicker load times and bolstered security.
Additionally, CloudFront is not just about speed and security. It offers a suite of advanced features, like edge computing capabilities, content optimization, and detailed analytics, making it a comprehensive solution for content delivery needs.
aws_cloudfront_distribution.tf:
resource "aws_cloudfront_origin_access_control" "current" {
  name                              = "OAC ${aws_s3_bucket.static_website.bucket}"
  origin_access_control_origin_type = "s3"
  signing_behavior                  = "always"
  signing_protocol                  = "sigv4"
}

resource "aws_cloudfront_distribution" "s3_distribution" {
  depends_on = [aws_s3_bucket.static_website]
  origin {
    domain_name              = aws_s3_bucket.static_website.bucket_regional_domain_name
    origin_id                = "${var.bucket_name}-origin"
    origin_access_control_id = aws_cloudfront_origin_access_control.current.id
  }
  comment         = "${var.domain_name} distribution"
  enabled         = true
  is_ipv6_enabled = true
  http_version    = "http2and3"
  price_class     = "PriceClass_100" // Use only North America and Europe
  // wait_for_deployment = true
  aliases = [
    var.domain_name,
    "www.${var.domain_name}"
  ]
  default_root_object = "index.html"

  default_cache_behavior {
    cache_policy_id        = "658327ea-f89d-4fab-a63d-7e88639e58f6"
    viewer_protocol_policy = "redirect-to-https"
    allowed_methods        = ["DELETE", "GET", "HEAD", "OPTIONS", "PATCH", "POST", "PUT"]
    cached_methods         = ["GET", "HEAD"]
    compress               = true
    target_origin_id       = "${var.bucket_name}-origin"

    //TODO : function_association

  }
  restrictions {
    geo_restriction {
      restriction_type = "none"
      locations        = []
    }
  }
  viewer_certificate {
    acm_certificate_arn      = aws_acm_certificate_validation.cert_validation.certificate_arn
    ssl_support_method       = "sni-only"
    minimum_protocol_version = "TLSv1.2_2021"
  }
  tags = var.common_tags
}
//TODO : aws_cloudfront_function for www redirect
Diving into the Terraform code above:
The aws_cloudfront_origin_access_control Terraform resource creates an AWS CloudFront Origin Access Control (OAC), which is a secure way to grant CloudFront access to your S3 bucket.
OAC use AWS Identity and Access Management (IAM) role trusts to provide CloudFront with short-term credentials to access your S3 bucket. This is more secure than using a CloudFront Origin Access Identity (OAI), which is a deprecated resource that provided CloudFront with long-term credentials.
aws_cloudfront_distribution: The primary configuration for our content delivery. Let’s break this down:
- origin: Defines the origin of our content - in this case, our S3 bucket.
- default_cache_behavior: Sets the caching policies, HTTP methods, and ensures our content is delivered via HTTPS for enhanced security. Here, the function_association also triggers our URL redirection function whenever a user request is made.
- aliases: Configures the domain names associated with the CloudFront distribution, facilitating access via our custom domain.
- restrictions: Geo-restrictions can be defined, but here it’s set to ‘none’, allowing global access.
- viewer_certificate: Associates our SSL certificate with the distribution, enabling HTTPS access.
Implementing CloudFront Function for URL Redirection
When users visit our site with ‘www’ (like https://www.yourdoamin.com), we want them to be sent straight to the root domain https://yourdoamin.com. This gives our website address a uniform look and can help with our search ranking (SEO). That’s where CloudFront functions come in.
Why Choose CloudFront Functions Over Lambda@Edge?
- Simplicity: CloudFront Functions are specialized for lighter, high-frequency tasks like URL redirections, making them straightforward to use.
- Low Latency: Designed for near-instantaneous execution, they ensure rapid, barely noticeable redirections for users.
- Cost-Effective: Typically more economical than Lambda@Edge, especially for high-request use cases like URL redirects.
- Ease of Deployment: Simpler and more direct management and deployment compared to Lambda@Edge.
cloudfront-function.js:
function handler(event) {
    var request = event.request;
    var hostHeader = request.headers.host.value;

    // Regular expression to extract the top-level domain and root domain
    var domainRegex = /(?:.*\.)?([a-z0-9\-]+\.[a-z]+)$/i;
    var match = hostHeader.match(domainRegex);

    // If the regex does not match, or the host does not start with 'www.', return the original request
    if (!match || !hostHeader.startsWith('www.')) {
        return request;
    }

    // Extract the root domain
    var rootDomain = match[1];

    // Construct and return the redirect response
    return {
        statusCode: 301,
        statusDescription: 'Moved Permanently',
        headers: {
            "location": { "value": "https://" + rootDomain + request.uri },
            "cache-control": { "value": "max-age=3600" }
        }
    };
}
To integrate this function code to our CloudFront distribution, we’ll make two updates in the aws_cloudfront_distribution.tf file:
//  *** Other configurations and code are hidden for clarity. ***

resource "aws_cloudfront_distribution" "s3_distribution" {

    //  *** Other configurations and code are hidden for clarity. ***

    default_cache_behavior {
        cache_policy_id        = "658327ea-f89d-4fab-a63d-7e88639e58f6"
        viewer_protocol_policy = "redirect-to-https"
        allowed_methods        = ["DELETE", "GET", "HEAD", "OPTIONS", "PATCH", "POST", "PUT"]
        cached_methods         = ["GET", "HEAD"]
        compress               = true
        target_origin_id       = "${var.bucket_name}-origin"

        function_association {
          event_type   = "viewer-request"
          function_arn = aws_cloudfront_function.www_redirect.arn
        }
      }

   //  *** Other configurations and code are hidden for clarity. ***

}

/*
  A CloudFront function to redirect www-prefixed URLs to the apex domain,
  enhancing user experience and consolidating domain authority.
*/
resource "aws_cloudfront_function" "www_redirect" {
  name    = "${local.prefix}-www-redirect"
  runtime = "cloudfront-js-1.0"
  code    = file("./cloudfront-function.js")
  publish = true
}
1) aws_cloudfront_function: This is the core terraform definition of our redirection function. It specifies:
- name: A unique identifier for the function.
- runtime: The runtime environment CloudFront uses to execute the function. (cloudfront-js-1.0).
- code: Points to the actual JavaScript code for the function, which resides in the file cloudfront-function.js.
- publish: When set to true, it means the function is immediately published and ready for association with distributions.
2) function_association within default_cache_behavior: This piece of configuration associates our function with the CloudFront distribution. Whenever a viewer request event occurs, the function specified by its ARN is triggered.
Configure Domain with Route53
Amazon Route53’s Hosted Zone is a container that holds information about how you want to route traffic for a specific domain, like example.com. It encompasses domain-specific record sets, guiding traffic to the intended destinations. When you register or manage a domain in Route53, you’re essentially creating or editing a hosted zone for it.
In this section we will setup out website’s domain using Route53 zone.
aws_route53_record.tf:
resource "aws_route53_zone" "main" {
  name = var.domain_name
  tags = var.common_tags
}

resource "aws_route53_record" "root_a" {
  zone_id = aws_route53_zone.main.zone_id
  name    = var.domain_name
  type    = "A"

  alias {
    name                   = aws_cloudfront_distribution.s3_distribution.domain_name
    zone_id                = aws_cloudfront_distribution.s3_distribution.hosted_zone_id
    evaluate_target_health = false
  }
}

resource "aws_route53_record" "www_a" {
  zone_id = aws_route53_zone.main.zone_id
  name    = "www.${var.domain_name}"
  type    = "A"

  alias {
    name                   = aws_cloudfront_distribution.s3_distribution.domain_name
    zone_id                = aws_cloudfront_distribution.s3_distribution.hosted_zone_id
    evaluate_target_health = false
  }
}
Examining each Terraform resource :
- aws_route53_zone “main”: This resource represents a hosted zone for your domain on Route53. It essentially provides a space to define how you want to route traffic for the domain. The name attribute specifies the domain name, and we attach any relevant tags for organizational purposes.
- aws_route53_record “root_a”: Here, we’re defining an ‘A’ record, which is essential for translating domain names into IP addresses. This record points our root domain (like example.com) to our CloudFront distribution. We utilize the alias block to directly associate this domain with the CloudFront distribution, ensuring that when users access our domain, they’re served content from our CloudFront distribution.
- aws_route53_record “www_a”: Similarly, this ‘A’ record is designed for the ‘www’ version of our domain (like www.example.com). It ensures that whether users enter the root domain or the ‘www’ version, they’re redirected to the same CloudFront distribution. Again, the alias block is used to link this to the CloudFront distribution.
Secure Your S3 Bucket
When hosting content on an S3 bucket, ensure proper access control. The aws_s3_bucket_policy “allow_cloudfront” grants CloudFront read-only access via Origin Access Control (OAC). This approach ensures exclusive content access through CloudFront.
aws_s3_bucket_policy.tf:
resource "aws_s3_bucket_policy" "allow_cloudfront" {
  bucket = aws_s3_bucket.static_website.id
  policy = data.aws_iam_policy_document.cloudfront.json
}

data "aws_iam_policy_document" "cloudfront" {
  statement {
    sid     = "AllowCloudFrontServicePrincipalReadOnly"
    effect  = "Allow"
    actions = ["s3:GetObject"]
    resources = [
      aws_s3_bucket.static_website.arn,
      "${aws_s3_bucket.static_website.arn}/*"
    ]

    principals {
      type        = "Service"
      identifiers = ["cloudfront.amazonaws.com"]
    }

    condition {
      test     = "StringEquals"
      variable = "AWS:SourceArn"
      values = [
        aws_cloudfront_distribution.s3_distribution.arn
      ]
    }
  }
}
Automatically upload your website files to S3 when you deploy
When deploying your static website, it’s essential to ensure that your site’s files are correctly and efficiently transferred to the S3 bucket. The terraform file below provides an automated approach to achieve this.
aws_s3_object.tf:
# Uploads all files from the local "src/dist" directory to a specified AWS S3 bucket.
resource "aws_s3_object" "static_file" {
  for_each     = fileset(local.dist_dir, "**")
  bucket       = aws_s3_bucket.static_website.id
  key          = each.key
  source       = "${local.dist_dir}/${each.value}"
  content_type = lookup(local.content_types, regex("\\.[^.]+$", each.value), null)
  etag         = filemd5("${local.dist_dir}/${each.value}")
}
Within the aws_s3_object resource, each file from the local ”./dist” directory is iterated over and uploaded to the specified AWS S3 bucket. The for_each directive here is used to go through each file in the directory. This means, when you run the deployment process, Terraform will automatically handle the upload of every file, ensuring the structure of your website remains consistent in the cloud. Furthermore, by determining the content_type dynamically, the configuration ensures proper handling and delivery of different file types, enhancing the performance and user experience of your site.
Outputs
Terraform outputs are essential for getting important information about generated resources, such as S3 bucket names and CloudFront URLs, for validation and post-deployment access.
outputs.tf:
output "dist_files" {
  value = fileset(local.dist_dir, "**/*")
}

output "s3_website_endpoint" {
  description = "S3 hosting URL (HTTP)"
  value       = "http://${aws_s3_bucket_website_configuration.website_bucket.website_endpoint}"
}

output "cloudfront_id" {
  description = "Cloudfront ID"
  value       = aws_cloudfront_distribution.s3_distribution.id
}

output "cloudfront_url" {
  description = "Cloudfront distribution URL (HTTPS)"
  value       = "https://${aws_cloudfront_distribution.s3_distribution.domain_name}"
}

output "website_url" {
  description = "Website URL (HTTPS)"
  value       = "https://${var.domain_name}"
}
Terraform Remote State (S3 & Dynamodb Backend)
This section is optional, but recommended for maintaining best practice standards.
Managing Terraform remote state is essential for teamwork and secure, scalable infrastructure. Using a remote state backend ensures that everyone on your team is working with the same infrastructure, and it helps you make changes safely.
To do so, we need to create a Terraform configuration file called
backend.tf :
terraform {
  backend "s3" {
    encrypt        = true
    bucket         = "my-org-tf-state"
    dynamodb_table = "my-org-tf-state-lock"
    key            = "my-static-website.tfstate"
    region         = "us-east-1"
  }
}
The provided Terraform code defines how to handle the state of your infrastructure using AWS S3 as a backend. In the context of Terraform, a backend determines how the state is loaded and how an operation such as apply is executed. It abstracts state management and locks the state to prevent conflicts in a team environment.
In the given code:
- backend “s3” specifies AWS S3 to store the state file.
- encrypt = true ensures your state file is encrypted.
- bucket = “my-org-tf-state” names your S3 bucket.
- dynamodb_table = “my-org-tf-state-lock” uses DynamoDB for state locking.
- key = “my-static-website.tfstate” sets the state file name.
- region = “us-east-1” sets AWS region where everything is stored. Change the region to where you prefer to store your state file, considering latency and any data residency requirements.
Important Notes for Adaptation:
Bucket Name: Ensure bucket is unique across all AWS since S3 bucket names are globally unique. Replace “my-org” with your organization or project’s name.
Region: Change the region to where you prefer to store your state file, considering latency and any data residency requirements.
Discover further details on provisioning the necessary resources for S3 remote state management by visiting the following the HashiCorp Developer Guide.
Assigning Variable Values
Early in this article, we defined various variables in our variables.tf file to create a flexible and reusable Terraform configuration. Now, it’s time to assign specific values to these predefined variables using the terraform.tfvars file. This practice aids in keeping our configurations modular and secure, preventing sensitive data from being inadvertently exposed in our main configuration files.
Here’s a quick snapshot of what your terraform.tfvars might look like:
aws_region  = "eu-west-1"
prefix      = "static-website"
domain_name = "example.com"
bucket_name = "my-static-site-frontend"

common_tags = {
  ManagedBy = "Terraform"
  Project   = "Static Website"
}
You will need to change the following values:
- Replace the domain_name value with your own domain name, which must already be registered with Route 53 or another domain registrar.
- You will need to replace bucket_name value with a unique bucket name for your static website.
To the Cloud ! 🚀 Deploy Your Website to AWS

Execute the following commands in a terminal from your project directory
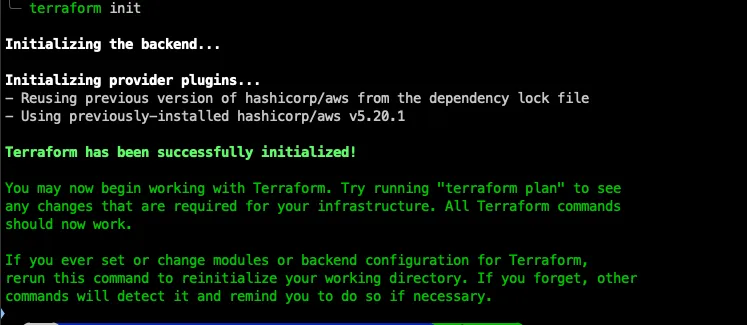
[terraform init]Prepares your Terraform project for use by installing necessary plugins and setting up the backend for state management. It’s the first command to run in a new Terraform project to get it ready for further actions.
Console output:
2. Apply Configuration
[terraform apply] command configures your AWS resources to match your code specifications. It provides a preview of changes, seeks your approval, and subsequently adjusts AWS resources, handling creation, modification, or deletion as needed.
Console output:
You should type “yes” in order to apply changes

Please note that deploying might take a while, potentially up to 30 minutes, due to CloudFront’s propagation across its extensive global server network and the necessary time for SSL certificate validation.
Once Terraform has finished deploying your infrastructure, you will see a success message with the output variables printed, as shown below.
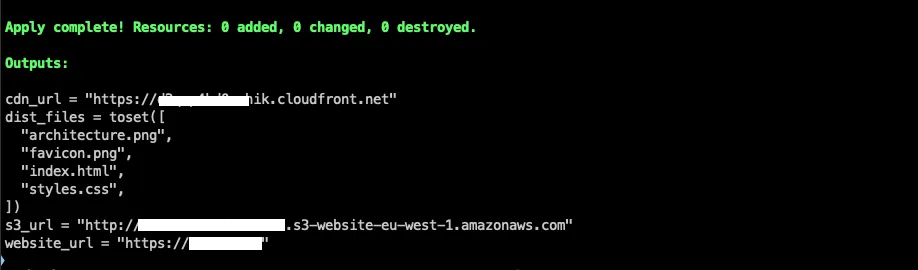
Confirming successful website deployment
Now, let’s see our website in action!
Launch your browser and navigate to your domain using HTTPS, like so: https://www.yourdoamin.com .
Your page should now load as shown in the screenshot below. If it doesn’t, or if you encounter any issues, please refer to the Troubleshooting section that follows.
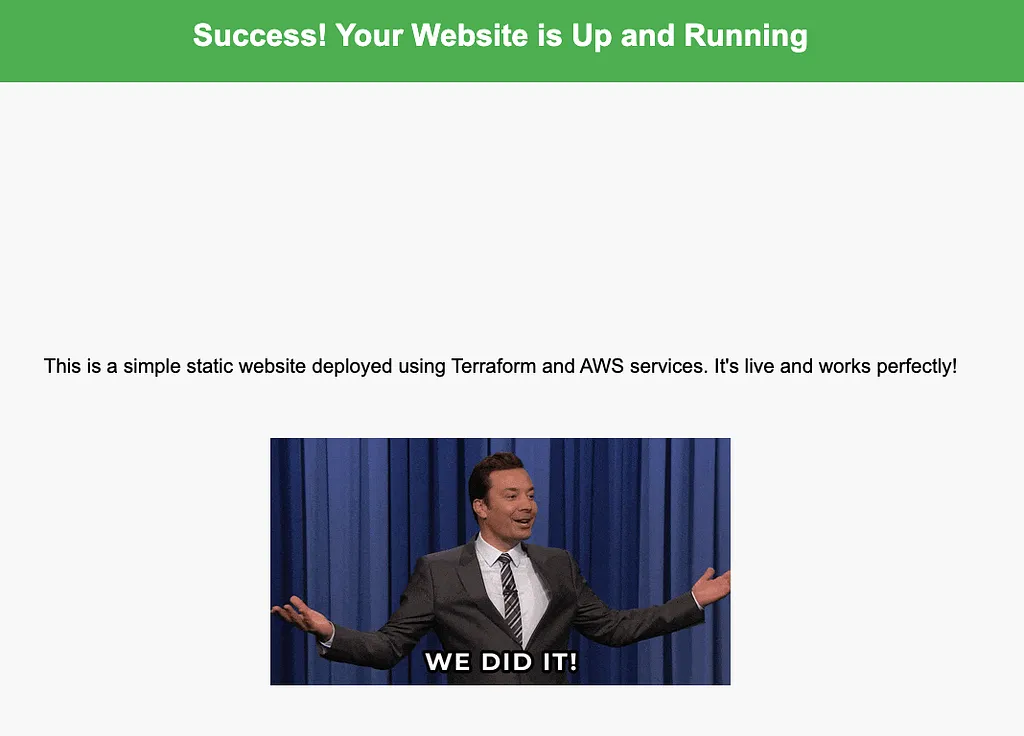
Next, let’s verify that the redirection from “www” to the root domain is functioning. Type https://www.yourdoamin.com into your browser - it should seamlessly redirect you to https://yourdomain.com. This redirection is made possible thanks to the configured CloudFront functions, ensuring both better SEO and consistent user experience.
Troubleshooting
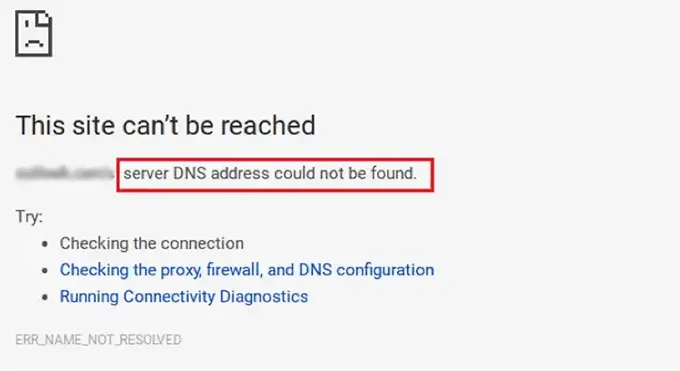
If you’re experiencing issues with DNS propagation, it could stem from a misconfiguration of your domain name’s name servers, especially if your domain is registered with a registrar different from Route53. In such cases, ensure to replace the name servers of your domain name with the NS records found in your Route53 Hosted Zone. This aligns your domain with AWS and assists in resolving any propagation issues that may arise.
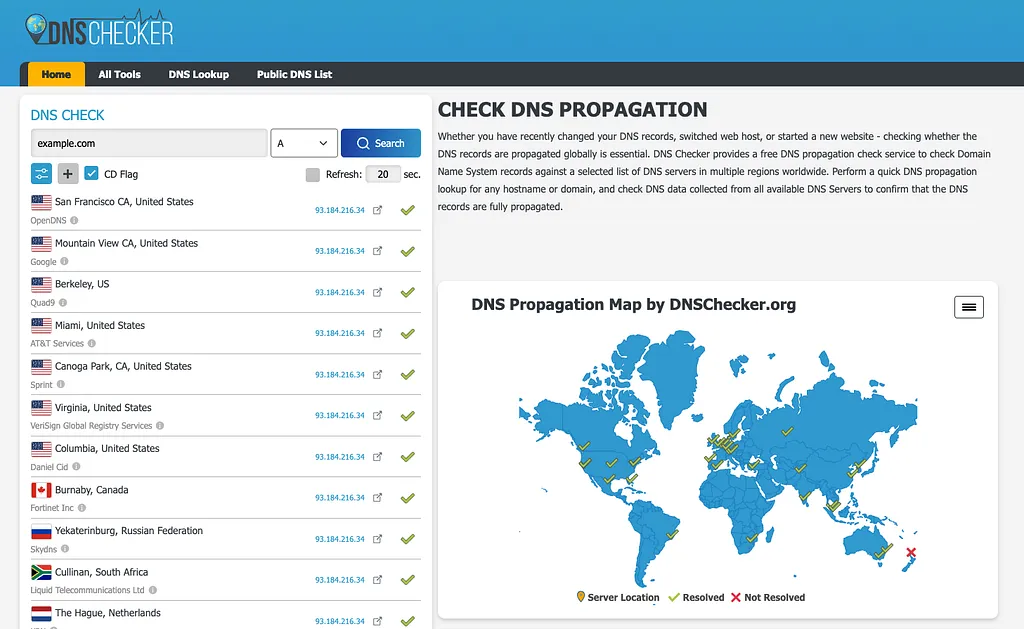
After adjusting your name servers, it can be handy to verify that the changes are propagating across the internet. A quick way to do this is by using an online DNS checker tool. You can visit DNS Checker to view the status of your domain’s DNS propagation worldwide
Estimating Your AWS Bill !

Let’s take a look at the possible expenses for hosting a static website on AWS, considering our current structure. Assuming each page load retrieves 1MB of data, and our website takes up 8MB of space on S3, and expecting about 1000 daily visitors, we’ll approximate the costs, keeping in mind the AWS pricing as of October 2023.
1. S3 Bucket
- Storing Your Website: Hosting 8MB of data on S3 will cost just a few cents per month because AWS charges $0.023 per GB.
- Loading Your Website: If every visitor causes 10 GET requests (300,000 in a month), the charge would be around $0.12 monthly.
2. Amazon CloudFront
- Sending Data to Visitors: If each visitor downloads 1MB of data, that’s 30GB per month. In the USA, the cost would be around $2.55 each month.
- Handling Requests: If each visitor causes 10 HTTP requests (300,000 in a month), it’ll cost about $0.30 monthly.
3. AWS Certificate Manager
- SSL/TLS Certificates: No extra cost here! ACM provides these certificates for free with CloudFront.
4. Route 53
- Hosted Zone: One hosted zone equates to $0.50 monthly.
- Handling Queries: For our 300,000 queries, the monthly cost would be about $0.12.
5. CloudFront Functions
- Running Functions: With 30,000 runs per month, the charge is just a few cents because AWS charges $0.1 per million runs.
Total Monthly Cost Estimate: Around** $3.57**

These numbers provide a rough idea and the actual cost may vary a bit based on exact usage and any price changes from AWS. For a more detailed estimate tailored to your unique usage, try using the AWS Pricing Calculator. And remember, it’s smart to keep an eye on your AWS costs and usage with tools like AWS Budgets and Cost Explorer.
Summary
In this article, we have shown you how to create a secure and scalable static website infrastructure on AWS using Terraform.
We covered the following steps:
- Setting up the AWS provider
- Creating an S3 bucket for website content
- Securing traffic with an SSL certificate through ACM
- Speeding up content delivery with CloudFront
- We used CloudFront Origin Access Control (OAC) to restrict access to the S3 bucket to only authorized CloudFront distributions. This helps to keep data safe and secure.
- Ensuring a consistent domain experience with a URL redirection function
As your team grows and your projects expand, you can use Terraform workspaces to manage multiple instances of infrastructure in an isolated and organized manner. This is perfect for development, staging, and production environments.
Thank you for reading this article. For a deeper dive and a more hands-on experience, check out the full project on GitHub repository link: https://github.com/tux86/static-website-hosting-amazon-s3